Using Large Profile Targets with Eye-One Matchby Eric ChanLast updated: February 27, 2007
The largest RGB printer profile target that comes with Eye-One Match contains 918 patches. However, you can create profiles using larger profile targets by replacing the default reference files with your own. The following step-by-step tutorial illustrates how to do this. I have tested these steps using Eye-One Match 3.6.1 and ProfileMaker Pro 5.0.7 running on Windows XP SP2.
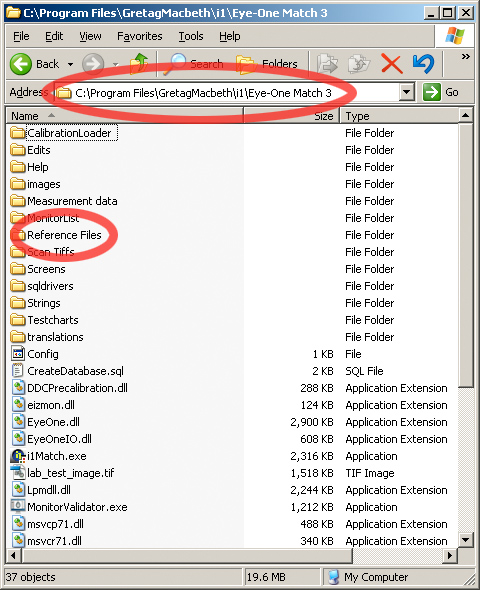
Part 1: SetupYou only have to perform the steps in this section whenever you change which printer target you want to use. (Actually, as we'll see, this setup will work for up to three targets.)First, determine which RGB printer profile target you want to use. I personally use Bill Atkinson's excellent RGB 1728 and RGB 4096 Eye-One Pro targets. Navigate to the folder where Eye-One Match is installed. You should see a folder called Reference Files as shown below.
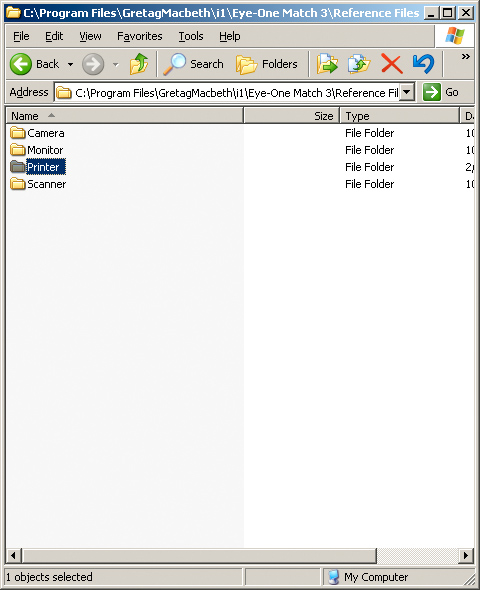
 Open the References Files folder. You should see a folder inside called Printer as shown below.
 Open the Printer folder. Now you should see a list of the default printer target reference files.
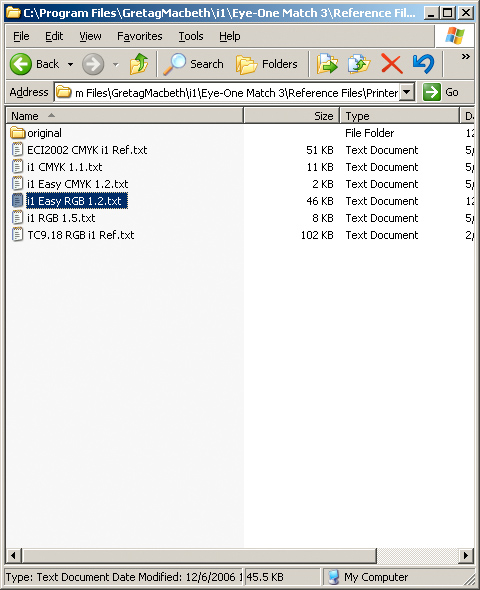 The three RGB targets are the ones that you get to choose from a menu in the Eye-One Match program when selecting a profiling target. The idea is that we're going to replace one of these RGB target reference files with the (larger) one that we want to use instead. However, Eye-One Match will only recognize the specific filenames shown above, so we will literally have to delete one of the original files. For this reason, I suggest that you make a copy of the original reference files and keep them safe in case you ever need to use them again. For example, let's say I want to use Bill Atkinson's RGB 1728 target and I don't need Eye-One Match's default Easy RGB 1.2 target. I take the 1728-patch target, rename it from "RGB 1728 Eye-One.txt" to "i1 Easy RGB 1.2.txt" and place it in the directory above, overwriting the old file. You can do the same thing with the other two RGB target reference files. For example, you can have the one named "i1 Easy RGB 1.2.txt" actually be a 1728-patch target (as described above) and the one named "i1 RGB 1.5.txt" actually be a 4096-patch target.
Part 2: Measuring TargetsDownload and install ProfileMaker Pro 5 (available from GretagMacbeth's web site). A software license and hardware dongle are needed to access all features of ProfileMaker, but you can read targets without a dongle. Launch MeasureTool, which is part of the ProfileMaker package.
 You'll get a message saying that you need a dongle to access all features of the program. Don't worry about it; just click OK.
 After MeasureTool opens, you'll see a toolbar that looks something like this. Most of the buttons may be grayed out. If that happens, click on the Configure Device/Port button (outlined in red below).
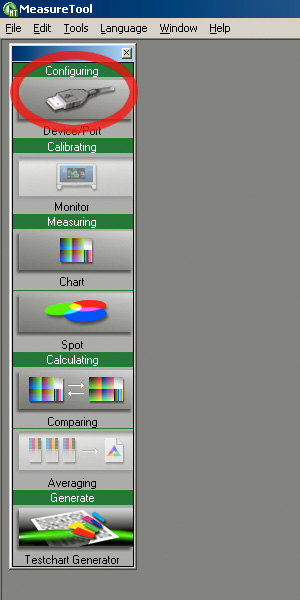 The Instrument Configuration box will come up. Plug in your spectrophotometer if you haven't done so already. Make sure to select the appropriate model name from the Instrument list.
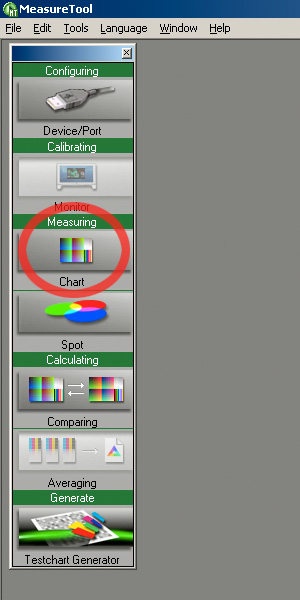
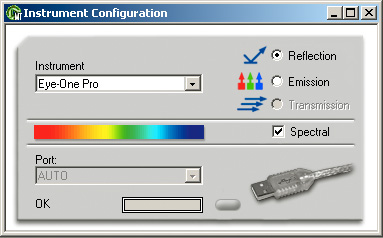 Sometimes, MeasureTool can be quirky about whether or not it recognizes the device. If it can't find it, click once on the Emission radio button, wait a few seconds, then click the Reflection radio button. Also, try unchecking the Spectral checkbox, waiting a few seconds, and re-checking the Spectral checkbox. You should see the OK message appear in the bottom-left of the dialog box. Regardless of what sequence of buttons or checkboxes you have to press in order to get MeasureTool to recognize your device, it is important that the final state of the buttons matches the state shown above: Reflection and Spectral should both be selected. Close the Instrument Configuration box. The Measuring Chart button (shown below in red) should now be available. Click it.
 The Test Chart Measurement box will come up. We will be using this box to load a profile target's reference file and to measure the real printed target.
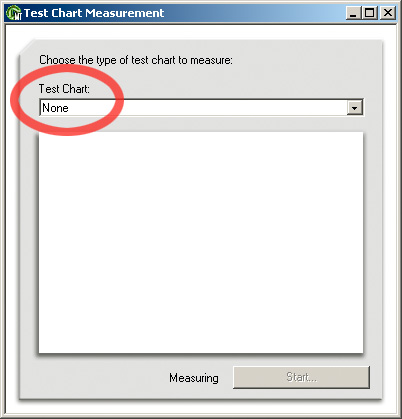 First, we need to open a profile target. Click on the Test Chart menu and choose Open...
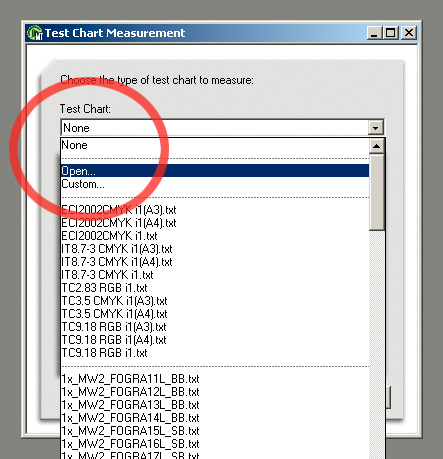 When the file selection box comes up, find the reference file corresponding to the printed target you want to measure (e.g., the RGB 1728 target reference file). You should now see a preview of the target in the box.
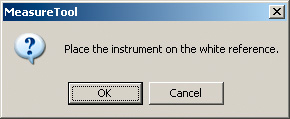
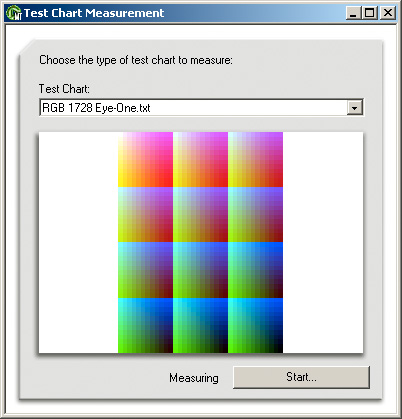 Click the Start... button. MeasureTool will instruct you to calibrate your spectophotometer:
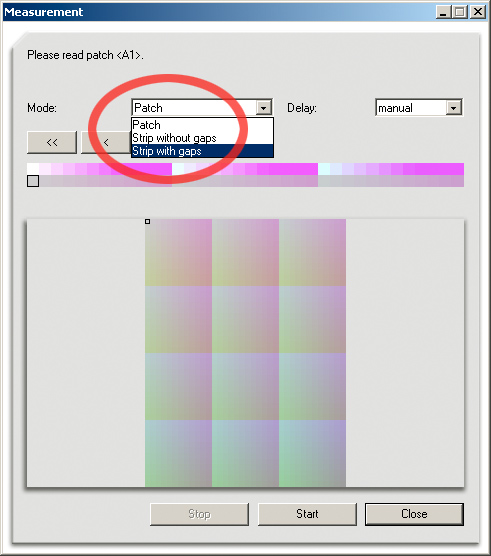
 The Measurement dialog box will come up. In most cases, you will want to set the mode to either "Strip without gaps" or "Strip with gaps" -- depending on the printed target. (Choosing Patch means that you will likely spend a verrry looonnnggg time scanning your chart and possibly watching the seasons change!)
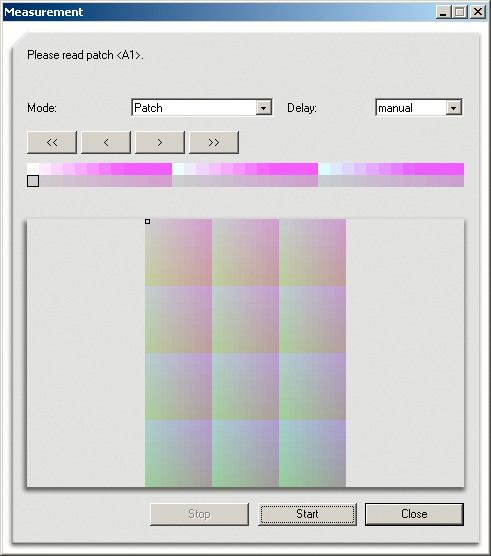 Bill Atkinson's Eye-One Pro targets use contrast gaps to differentiate patches, so I select "Strip with gaps" as shown below.
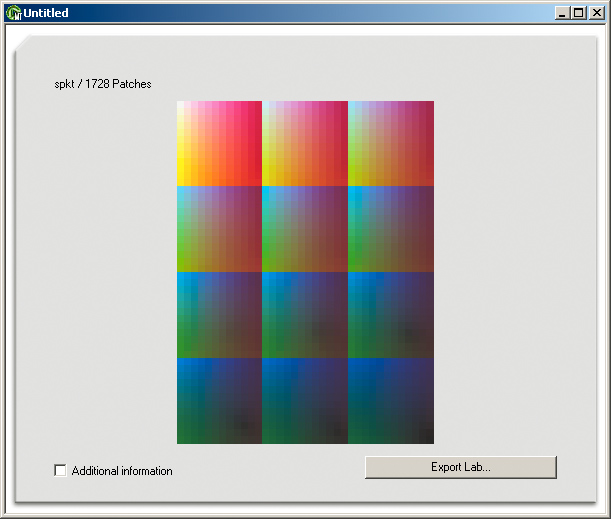
 Carefully measure your target using your spectrophotometer. Afterwards, you can close the Measurement box and you will see a preview of your measured target. Go to the File menu and choose Save As... This will let you save the spectral measurements of the target to a text file. I suggest using a descriptive name which will help remind you what the measurements correspond to (e.g., printer, paper, driver settings, etc.)
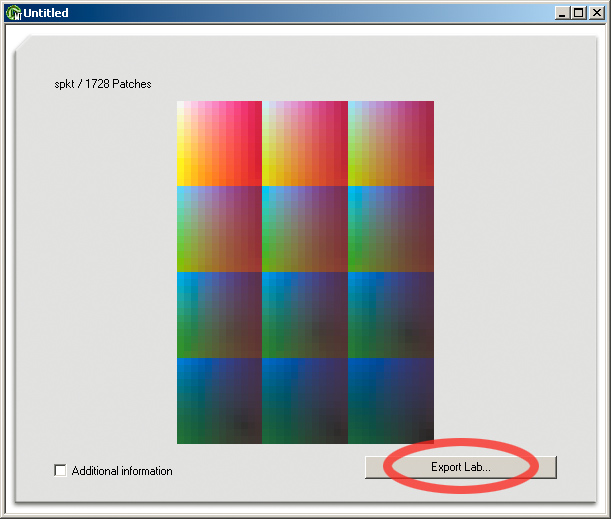
 You can also click the Export Lab... button (highlighted below), which lets you save the same data (as Lab values) to a text file. I usually do this because then I can later import this data into profile-making software which only accepts Lab inputs.
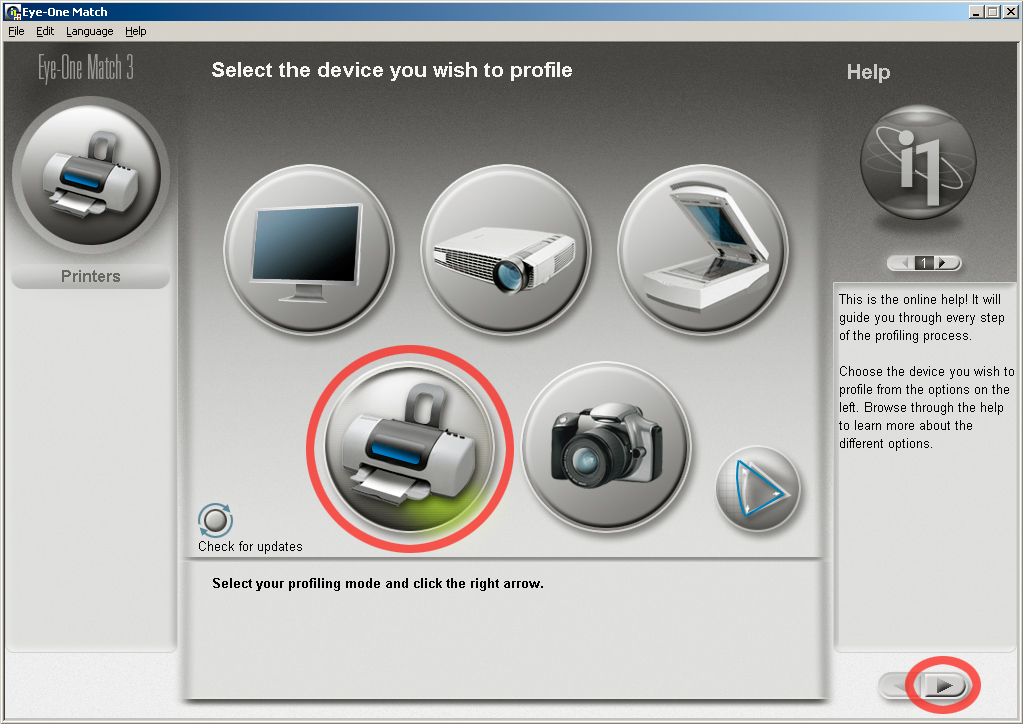
Part 3: Profile CreationIn the final part, we feed the measured data into Eye-One Match to create the profile. Launch Eye-One Match. Even though we have already used the spectrophotometer to measure the target, we need to leave it plugged in; otherwise Eye-One Match won't work.
 When the main interface comes up, click the printer icon and then the right arrow.
 Choose "Other (RGB)" from the first menu and the appropriate target from the second menu. For example, if you measured the RGB 1728 target and named its reference file "i1 Easy RGB 1.2.txt" in Part 1 above, then choose "i1 Easy RGB 1.2.txt" from the second menu. You'll see part of your target show up in the preview window (it might appear split over multiple pages). Finally, click the button corresponding to "Load the measured chart" and then click the right arrow.
 Eye-One Match will ask you to select your measurement data. Find the text file containing the spectral values that you saved at the end of Part 2 above. Click OK.
 Eye-One Match will then begin building your profile. This will take a minute or two. At the end, you can save your new ICC profile.
|