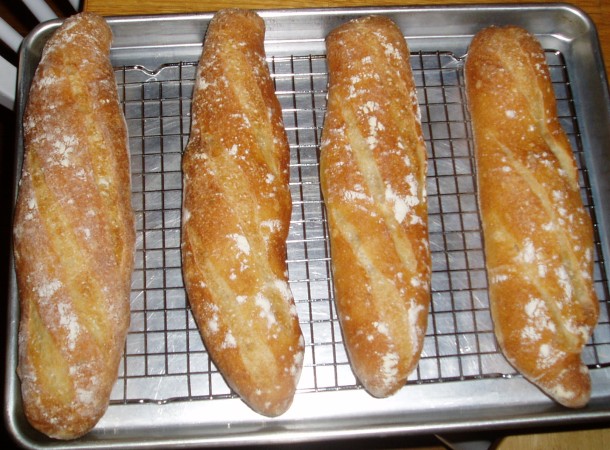
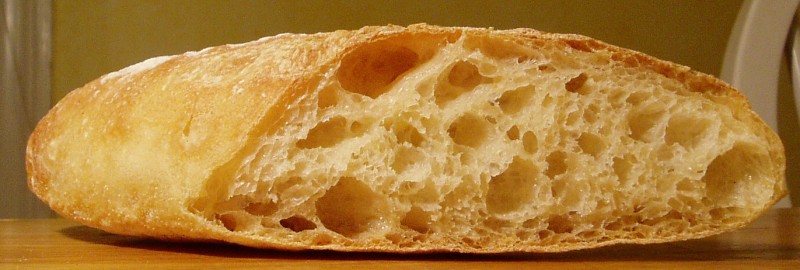
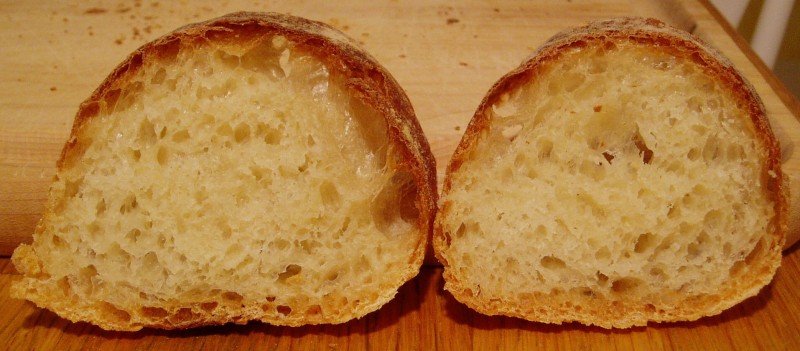
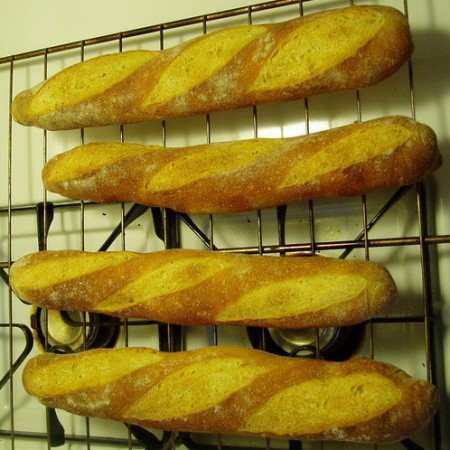
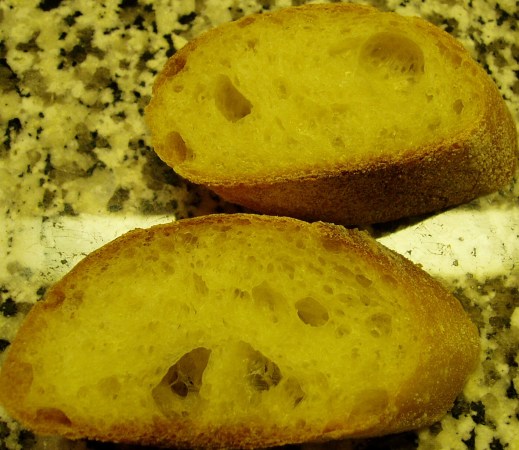
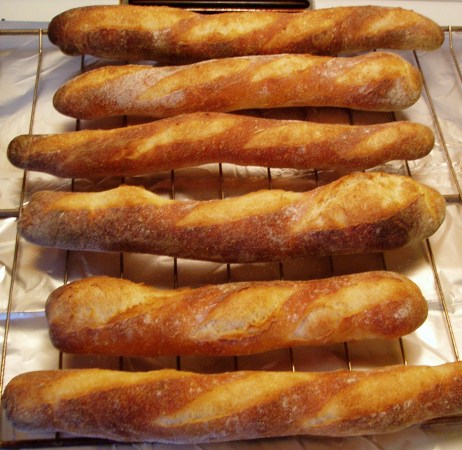
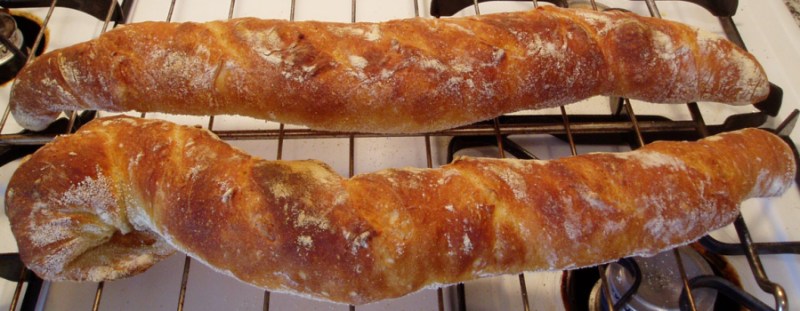
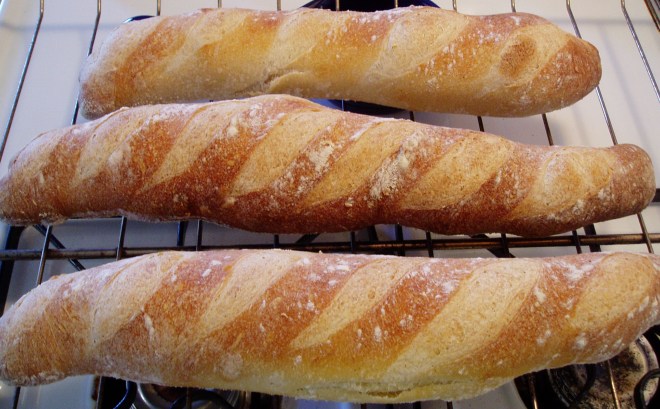
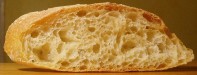
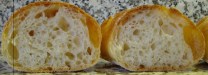
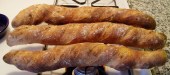
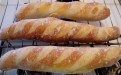
| 2/4/07 |  | Followed Julia's
shaping steps and used 100% AP flour. 19-21 minutes wasn't long
enough---crumb was a little too soft. Shoud change the recipe to
50-50 flour. |
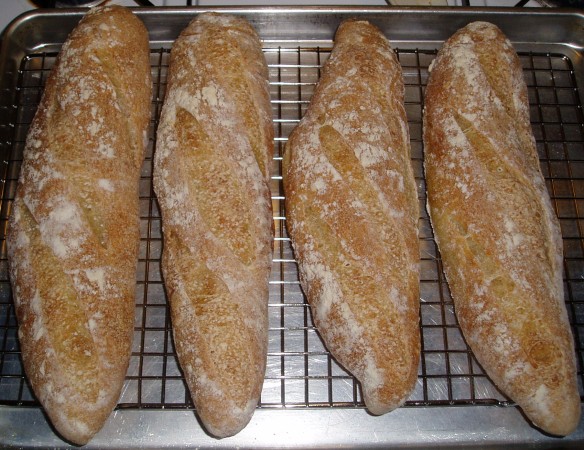
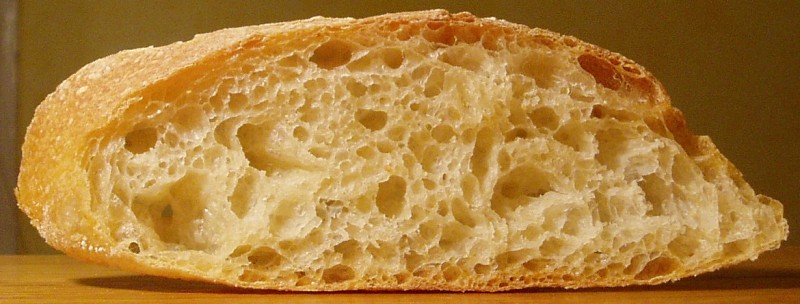
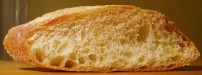
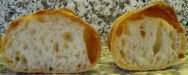
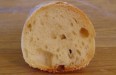
| 10/10/06 | | Made bread over the
weekend. One flaw was that I only did a single envelope-fold for each
loaf. The loaves came out a bit flat-looking, probably due to the
lack of surface tension. Used 50-50 flour; texture, flavor and crust
all came out excellent. |
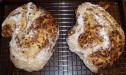
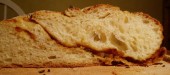
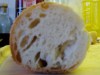
| 9/12/06 | | Made a batch for
Helen's birthday that turned out excellent. I used 8 oz. bread flour
& 8 oz. AP flour. Crust was a bit crunchy, crust was flavorful and
chewey. |
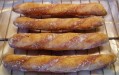
| 5/1/06 | | Did a three-rise
batch over the weekend. Came out great. Very flavorful. Some nice
holes. Crisp crust on bottom, a bit softer on top. Even successfully
slashed the baguettes. I took the breads out after 19 (outer) and 22
(inner) minutes. The middle was still slightly moist after 30 minutes
cooling. I noted that the dough was very difficult to pull together
at the beginning. Felt like there was too much water. Had to add a
good bit of flour during kneading. But, I was very happy with the
result. |
| 3/13/06 | | Welp, I've now
had a number of B&R breads, and there seems to be a consistent, clear
deficiency: salt. The crust and crumb are excellent, but the flavor
leaves something to be desired. Though, low salt means that the
breads serve as an excellent vehicle for other foods...
None of them have had the flavor that you expect
from great bread. Hopefully, Mike is experimenting with salt
proportions b/c his crust and crumb texture are excellent. |
| 1/23/06 | | One of my
favorite Boston bakers, Michael Rhoads (formerly of Sel de la Terre),
will be opening a new bakery in Framingham, MA. He's hired Rachael
Cummings away from SdlT, so the boules are sure to be excellent
(Rachael's technique is amazing). The contact info is
B & R Artisan Bread
Michael Rhoads and Jen Bones, Owners
151 Cochituate Road, Framingham, MA 01701
Phone: 508-370-7730 Fax: 508-370-7738
They will be delivering bread daily to Formaggio, so you don't
have to live in Framingham to enjoy. The slated opening date is
January 30, 2006. See my 8/28/04 post (below) for my experience
baking at Sel de la Terre with Michael & Rachael. |
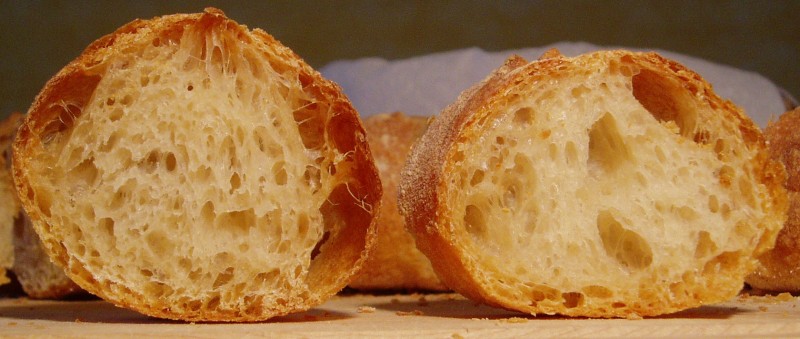
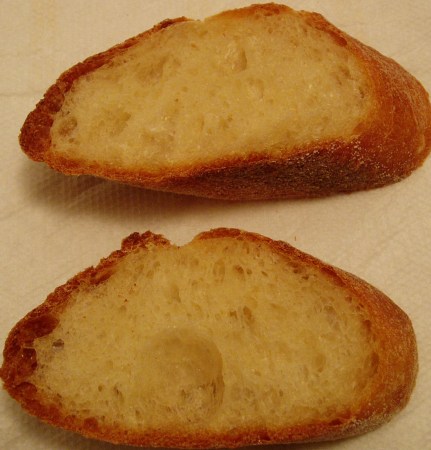
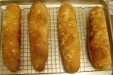
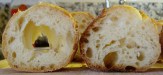
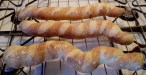
| 1/8/06 | | I did two batches
today, one all AP and one 1/2 AP, 1/2 Bread flour. I also
experimented a bit with ice cubes. I tried putting 10 ice cubes in
the bottom of the oven right before putting in the loaves. I didn't
see a noticable difference vs. earlier tries. Though, I don't think
there's any need to do what I have done in the past---add one cube
every minute for the first three minutes. I think I can just put them
all in at the beginning. I "botched" the all AP batched by leaving
the oven at 500F. I noticed after 10 minutes of baking and turned it
down to 450F and baked for 20.5/22 minutes. The mistake was actually
a success---the loaves ended with a nice caramel-brown color, whereas
the half/half batch was more of a dull, yellow-brown. The half/half
batch took longer to bake, even considering the lower temp, 25/27
minutes. Fits with my hypothesis that bread flour takes longer to
carmelize. The half/half batch received an extra-long second rise
(close to 4 hours).
The left two pictures below are of the pure AP bread. The right
picture is of the half/half bread. I think the pure AP bread came out
a bit better, but that might have been due to the difference in baking
temperatures. |
|    |
| 1/3/05 | | I baked bread at
my parents-in-law's house. Twice, in fact, so I even got a chance to
refine the recipe a bit. First try, I used KA AP flour, a whole
packet of active dry yeast, 2 t. of table salt and let the loaves
proof on a cookie sheet (dusted with corn meal). I used fairly hot
water (I'd guess 110F+) for the initial mixing. The dough rose very
quickly for the first two rises, but didn't rise so well in the oven.
Also, the bread lacked a bit of flavor. Otherwise, it came out very
nicely and could be considered a success. For the second try, I upped
the salt to 2 1/4 t., cut back on the yeast to 1 1/4 t. active dry,
and lowered the temperature of the water (to ~95F). It still lacked a
bit of flavor---I should try 2 1/2 t. next time. But, rising worked
much better. It rose more gruadually during the early stages and
produced a better crumb---no huge holes, but overall pretty air-y and
light-feeling. I used lots of ice cubes---more than usual. Seemed to
work well. I might try using more ice cubes in my regular recipe;
also might be good to add the ice cubes a minute before
throwing in the bread.
|
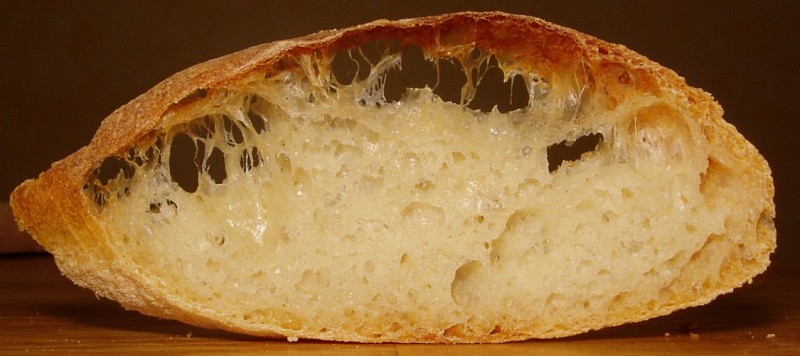
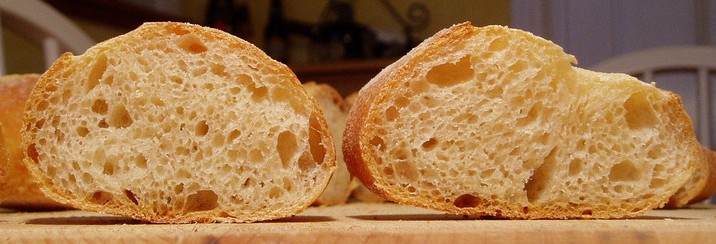
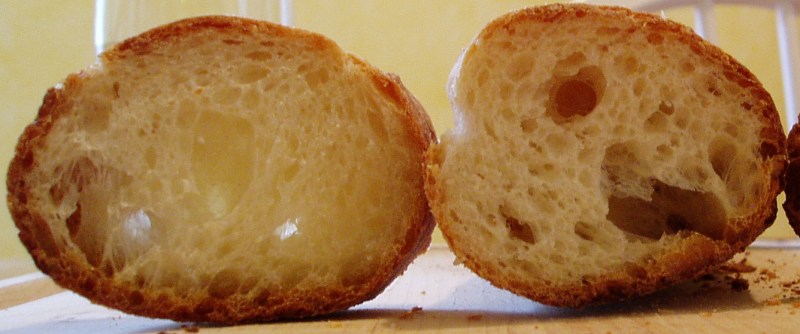
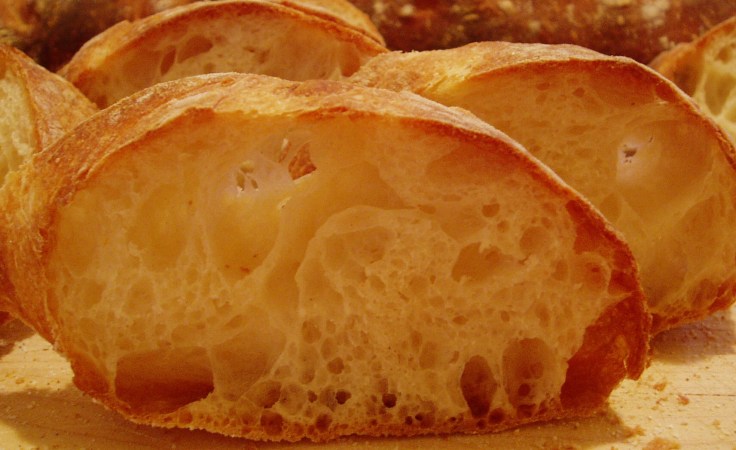
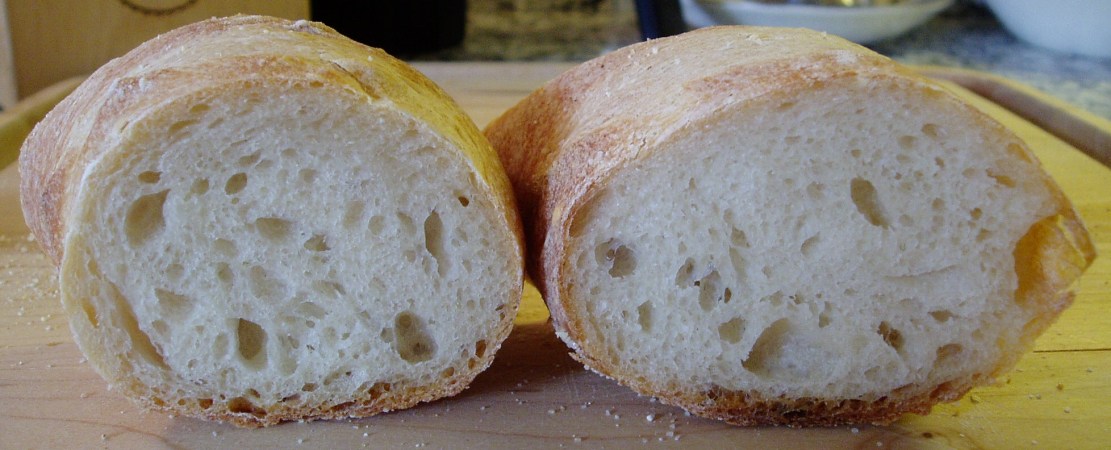
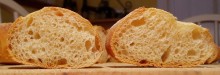
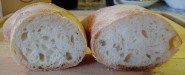
| 12/26/05 | | The results are
in! And, the winner is... (drum roll) Julia! Julia's bread had a
tender, crispy crust with an airy, chewy crumb and great flavor. I
tried to convince myself that the overnight fermentation of Reinhart's
recipe yielded better flavor, but I gave up in the end. Any
improvement in flavor over Julia was greatly outweighted by the too
thick and crispy crust of Reinhart, and the dry, thick crumb. Some of
this could have been due to the slightly longer baking time I used for
Reinhart, but there's no way Reinhart's recipe could have created the
airy-ness that Julia's produced.
One observation I made that I didn't expect is that the AP flour
created more even holed throughout the bread. Some of my recent
(bread flour bsased) loves had created very large, uneven crumb
structure. I attribute the difference to gluten. Bread flour has
high gluten content, which I presume allows for the creation of large
bubbles. My guess is that AP flour can't do this due to lack of
gluten, so the bubbles are more evenly distributed throughout the
dough. Bread flour yields the more dramatic pictures, but I must say
I much prefer the AP flour result for eating. It simply feels better
in the mouth. Also, it's better for dips, spreads and for making
French Toast (which Helen and I did this morning---absolutely
fabulous!).
|
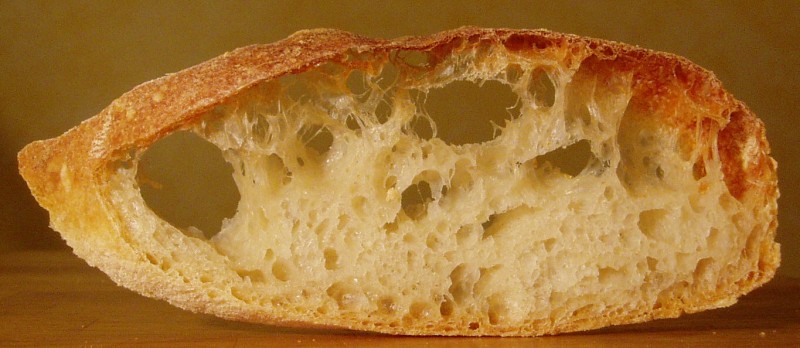
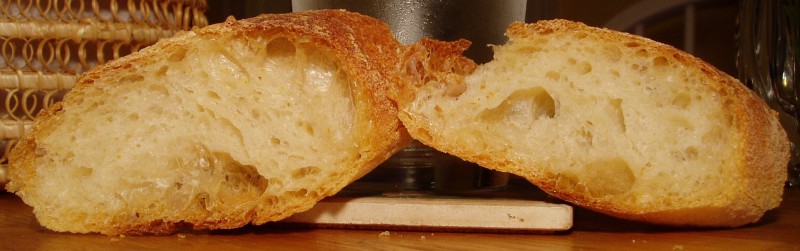
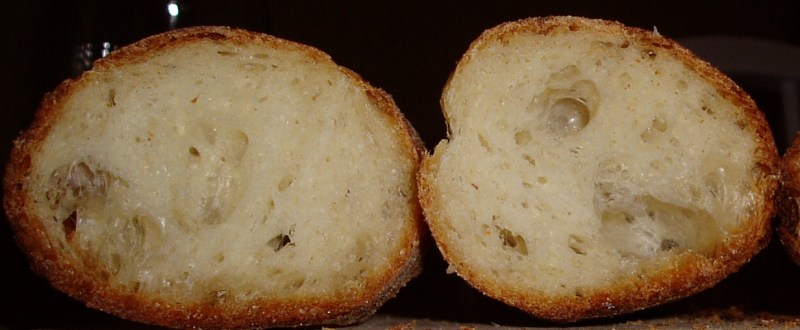
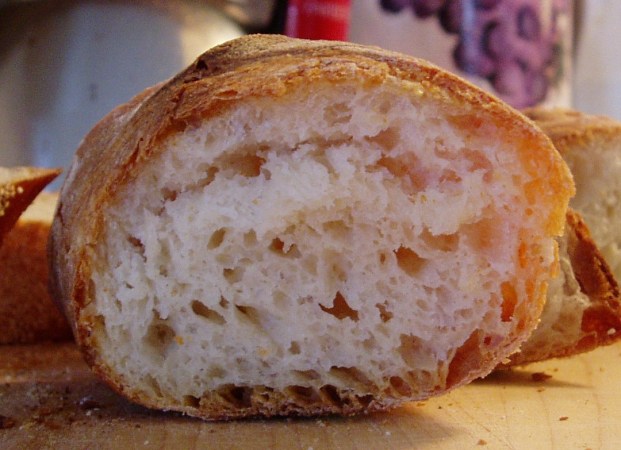
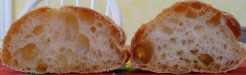
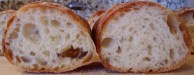
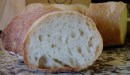
| 12/24/05 | | Today, I ran a
bake off. Reinhart
vs. Julia.
New school vs. old school. Two masters facing off. Though, I should
note that the recipes are heavily modified. The two recipes use
identical ingredients. The difference is that (what I call) the
Reinhart version uses a pre-ferment that sits in the fridge overnight.
Julia's version does everything in the same day. I used AP flour for
both recipes for two reasons: (1) to see for myself what AP flour does
to bread, and (2) to simplify the experiment. After having used
strictly bread flour for so long, it was enlightening to see the
effects of AP flour. The dough was much looser and easier to work
with. Shaping was much easier.
Interestingly, Julia's recipe yields more airy bread.
Reinhart's rises more in the oven (creating very circular loaves), but
Julia's swells much more during proofing. And, Julia
recommends intentionally popping bubbles during the shaping phase, so
it's not that Julia's dough retained more bubbles from the rises.
Though, it is worth noting that Julia's dough rises better. Her
descriptions of the dough tripling in size during the first rise are
accurate. Reinhart's proofed dough was easy to slash (maybe because
it didn't swell so much?), where as Julia's was difficult---I couldn't
make deep cuts.
I baked Julia's loaves for 22/23 minutes; I baked Reinhart's for
23/24.5 minutes. Much shorter times than I had done recently. I
wonder if AP flour bakes more quickly...
|
|  |  |  |  |  |  | | Julia's three-rise | Reinhart's pre-ferment |
|
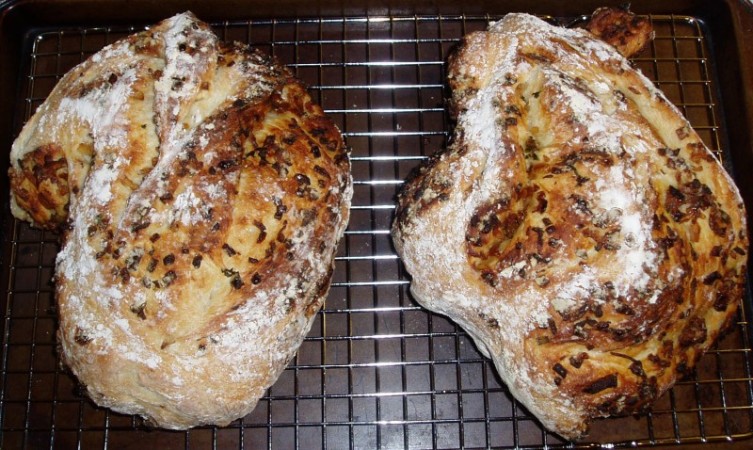
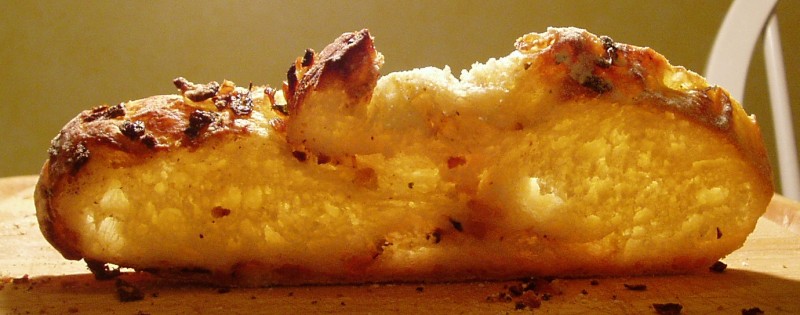
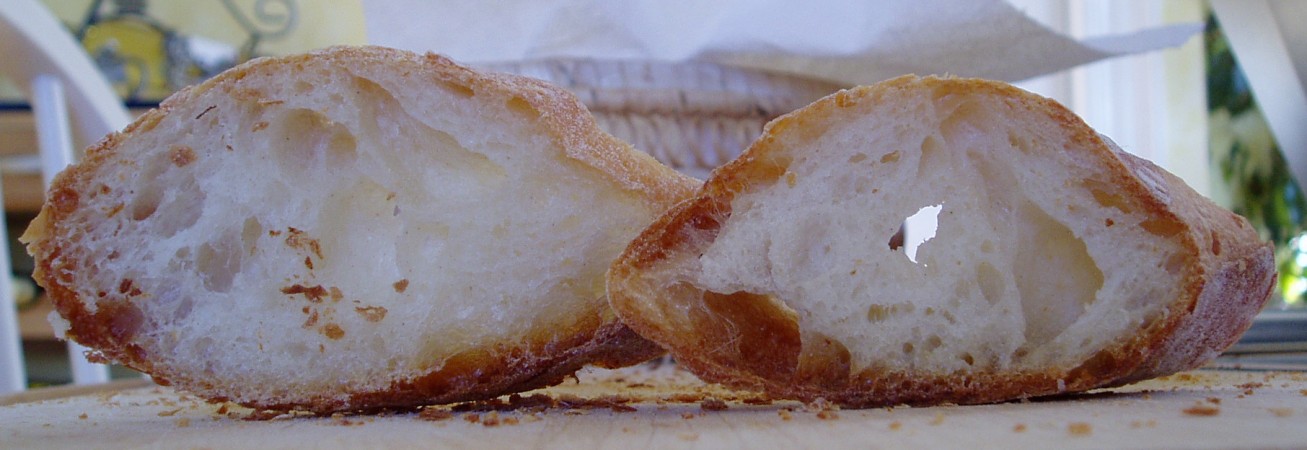
| 12/23/05 | | I'm branching
out. Today, I made herb and carmelized onion ciabatta for Helen as a
Christmas present. I mostly followed Reinhart's
recipe; the carmelized onion and herb ciabatta is an alternate version
of his ciabatta. I made up my own ciabatta
recipe, using proportions based on my french bread recipe. It
starts with a poolish, a super-wet dough (1:1 water-to-flour ratio),
that is fermented overnight in the fridge. This is later combined
with a dry-er mixture to create a more reasonable water-to-flour ratio
(around 0.75:1). The main difference between ciabatta and french
bread (as I understand it) is the shaping. Ciabatta uses a fairly
simple shaping proceedure---the dough is folded on itself multiple
times and fermented on a flat surface (rather than in a bowl).
Reinhard recommends bread flour for the entire recipe. As I now know,
bread flour gives great chewiness and spectactular structure (holes)
in the crumb, but is very resillient and is not easy to shape. I
roughly knew this before. I knew that bread flour had higher gluten,
and gluten is what you might call the glue or internal bonding agent
of dough. But, it wasn't until this weekend that I could see the
difference clearly. Anyway, bread flour works great for ciabatta
because the shaping is relatively simple---and you get that great
chewey crumb.
The onion and herb experiment seemed like a disaster. Reinhart tells
you to incorporate the mixture fairly early; I waited until right
before proofing. I added the mixture as I was folding. I succeeded
in doing two add-and-fold steps (as Reinhart tells you to). But,
after that I still had onion and herbs left, so I tried to do another
add-and-fold step. Oops. The dough at that point was very hard to
control---it just didn't want to do another fold. And, the wetness in
the onion and herb mixture made it impossible to get the dough to
stick to itself. I.e. two folds was all I was going to get. At that
point, the dough was just a single loaf, so I cut it in two and threw
the doughs on the canvas for proofing. I didn't attempt to shape any
further---the dough wasn't going to listen to me any more at that
point. It looked like a total mess---carmelized onions were oozing
out the sides of the dough. It stained my canvas. I though there was
no hope, but I trudged on. After proofing, I slid the loaves in the
oven and hoped for the best. Magic happened in the oven. What came
out looked gorgeous and tasted even better. Helen was ecstatic and is
now demanding that she can give requests for me to bake a special
bread for each holiday. :) No way I can describe what the loaves look
like, so I'll let the pictures do the talking.
The inside of the bread was very tender---not chewy at all. I
think it's due to a lack of kneading (not due to AP flour, as I
originally thought).
|
|    |
| 12/18/05 | | I am currently
eating bread that I baked over 4 weeks ago. How is that possible?
Simple: the freezer. I wrapped the loaf in plastic wrap and stuck it
in the freezer. Today, we took it out about an hour before dinner,
stuck it in the oven at 400F (preheated) about 10 minutes before
dinner, and enjoyed very good bread (not as good as freshly baked, but
much better than most breads you can buy at the store. Even
better is if you can take the bread out 2 hours before eating. Then
it will have time to come to room temp without added heat, which is
the best way to defrost.
|
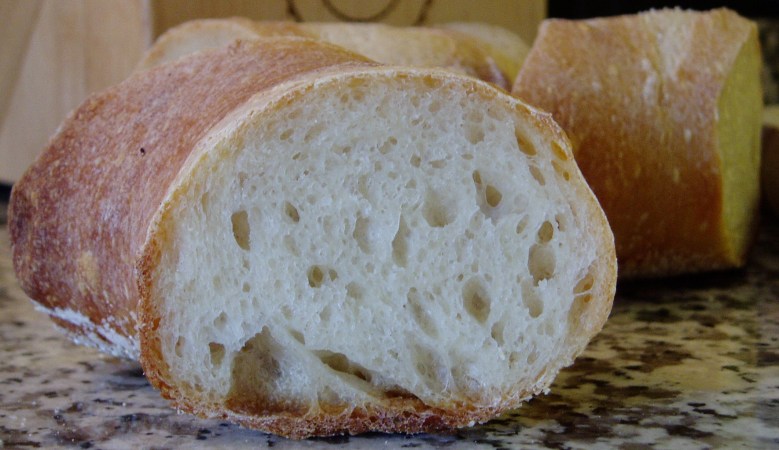
| 11/19/05 | | Used Julia's recipe again. First rise went
slowly (6 hours), but temperatures in the house were about 65F.
Second rise was normal (1 3/4 hours); room temperature was quite a bit
warmer, about 75F. I proofed for about 1 3/4 hour, again in a warm
environment (75F). I didn't slash, but the loaves still deflated when
I put them in the oven. But, the end result was fully-inflated
loaves---round from a side-view---clear improvement over slashing.
One thing I realized is that I should put the initial 3 ice cubes in
the oven about a minute before sliding in the loaves. This will give
the ice a chance to create humid oven environment. I baked for 30-33 minutes.
Wow. I think I've done it. I've achieved the unachievable.
I have mastered French bread, at least as far as the gustatory
experience is concerned. My loaves don't have the visual appeal that
your usual French baguettes have, but their taste is superb. The
crust is thin, crunchy and brittle; the crumb is hole-y, chew-y and
flavorful. I'm not sure if I've ever had French-style bread this good.
Well, I think they could do with just a touch more salt. I'm
going to up the recipe to 4 t. Kosher salt.
|
|    |
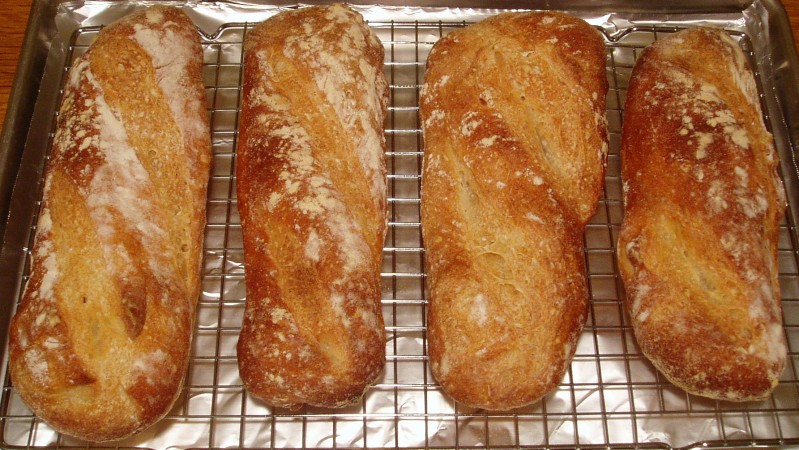
| 11/5/05 | | Old School. Went
back to Julia's recipe, though I
incorporated a lot of tips from my pre-ferment
recipe. I was surprised how smoothly it went. Risings took
exactly as long as she said they would. I used my proportions---I
still think she uses waaaaay too little water. Followed her forming
steps, though I cut into four pieces instead of three. I baked at
450F, but for longer than she suggests---29 minutes for the outer
loaves, 32 minutes for the inner loaves. She is very right when she
says that the bread needs to cool 2-3 hours. It's too moist in the
middle if you eat it sooner than that. I slashed the loaves, but
didn't like the result---they instantly deflated and didn't fully
re-flate in the oven. Julia says that slashing is for decoration; I'm
guessing that it serves no other purpose. One problem with doing 4
loaves is that they just barely fit my cookie sheet. Two of the
loaves actually joined in the oven---I had to cut them apart. But,
I'm amazed that her 35-year-old recipe (originally published 1970) is
as good as it is. The true test will come tomorrow, but I have a
sense that her basic instructions are better than Reinhart's.
|   |
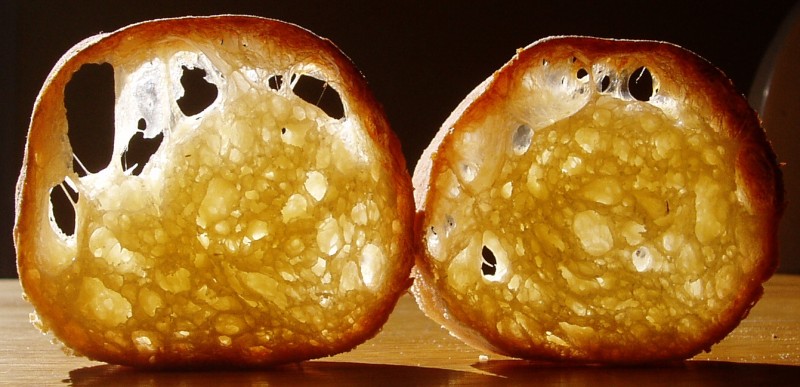
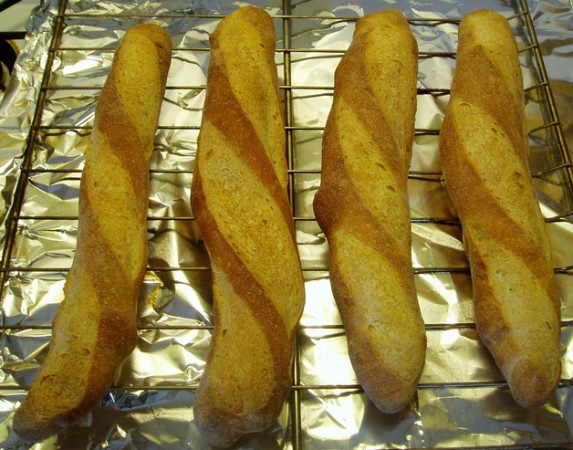
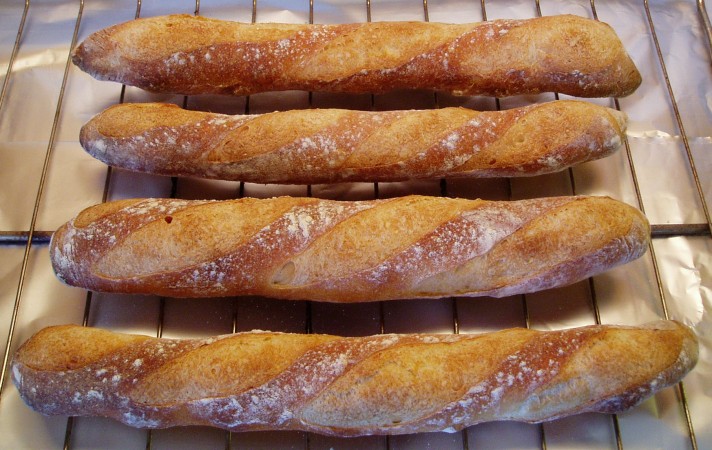
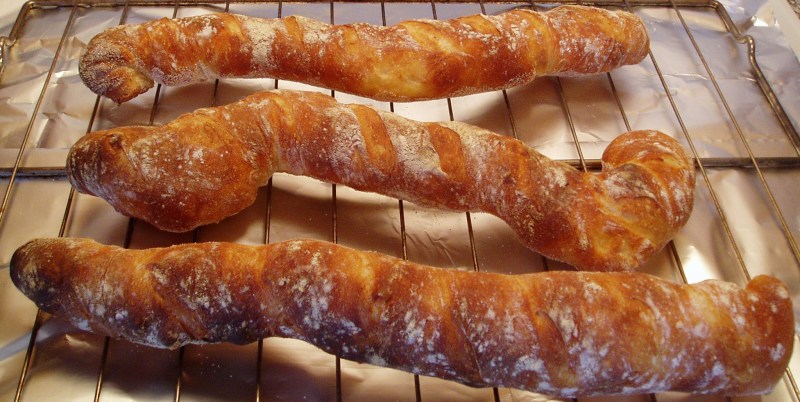
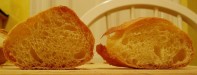
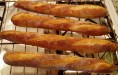
| 10/29/05 | | Very wet dough,
as usual. I did step 2 as a regular rise (no refidgeration). Dough
was warm to the touch after the step 2 rise. For step 3, I didn't
chop the pre-ferment into small pieces, just kneaded the two doughs
together. Seemed to work fine. My rise times were 1.5, 2, 3, 2 hours
(steps 1, 2, 3, 4 respectively). From L to R in the picture, I baked
26, 28, 29, 30 minutes. First two were the "outside" batards. Much
darker crust than I usually do. Crust darkened more quickly than
usual. I decided to not slash before baking. Took some cool
pictures with natural light shining through the bread the day after
baking (far right). |
|     |
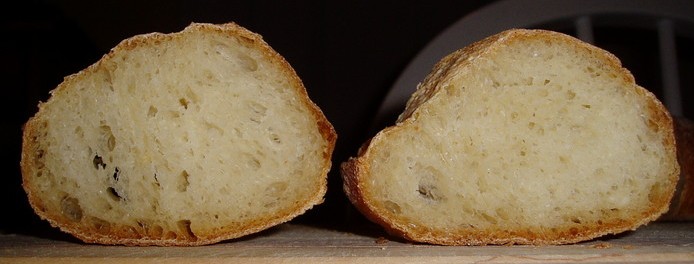
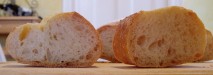
| 10/15/05 | | Dough felt very
wet, took a lot of extra flour to keep it sticking to my hands.
Cooler than last time (mid 60s). New, long step 3 & 4 risings.
Flavor wasn't as good as last time (maybe need even longer risings
when ambient temp is lower?). Good holes. Don't think I baked long
enough, though. Crust was dark brown, but fairly thin---didn't get
nice crispy skin like last time. Skipped the baguette shaping
step---ended up with shorter, wider loaves; they were similar in shape
to Dominic's
ciabatta loaves. I really liked the shape. Just need to bake a bit
longer. I did 25-26 mins for the outer loaves, 28 mins for inner
loaves. I think it needs to be more like 27/30. One mistake I made
was to proof the loaves seam-side up. This caused the dough to stick
to my bread board. However, it's not easy to keep the dough from
sticking. It's important to make sure that all sticky surfaces of the
dough are turned inward once shaping is finished. The sticky surface
is so large after rising that it's difficult to fully turn it inward. Need to work on this.
| |   |
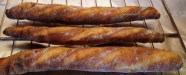
| 10/08/05 | | Dough felt
very wet, took a lot of extra flour to keep it sticking to my
hands. Very high humidity and relatively warm temperatures (70s).
Let dough rise extra long---3.5 hrs in step 3, 1.5 hrs in step 4.
Excellent rising. Dough filled a 12 cup bowl in step 3, at least
doubled in size for proofing. I forgot to slash the baguettes before
putting them in the oven! Doh!!!! Bread came out extremely well,
considering the blunder. Baked longer than usual, 26 mins for one
baguette, 28 mins for the rest. Also, turned up temp at end (after 20
mins) to 500F. Crust turned out great---crunchy on outside, chewy on
inside; I should integrate this into my recipe. Used bread flour for
step 4. I think regular flour is better than rice flour for this
step. In step 4, I did not leave enough room between the baguettes.
There was very little room for me to insert the bread board. Need to
make sure to space out baguettes on the canvas (part of the problem
was the fact that the dough rose so much during proofing! :) The
shaping that I use, batard, then baguette I think may make the dough
too long & thin. I should try just doing the batard shaping and
not proceeding further. Really excellent internal texture, I think
due to the excellent fermentation/risings. Helen thought it was the
best texture yet.
| |   |
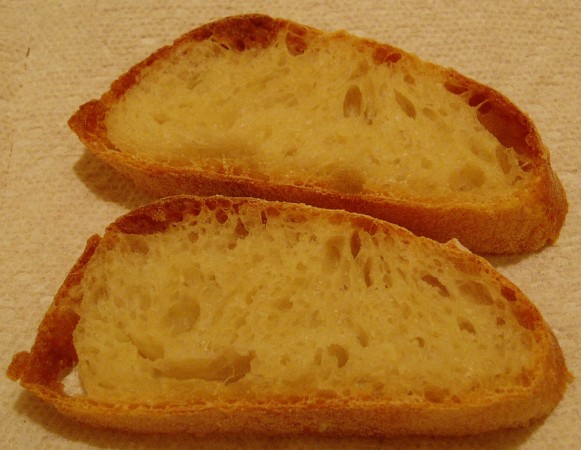
| 10/02/05 | | Used new instant
yeast. Noticed better rising. Outside baguettes done @ 22 mins,
inner baguettes done @ 25. Great flavor. Pretty nice holes.
Thinking it'd be even better if I let it proof for longer, say 2 hours
instead of 1. Would also be good to try higher-temperature baking.
| |    |
| 9/25/05 | | I should add a
little more salt (e.g. 1/4 t. to second mix). I did a good bit of
kneading both times. I rotated outer baguettes @ 15 minutes; they
were done @ 20 mins; inner baguettes were done @ 22.5 mins. Dough did
not rise much; probably a combination of old yeast and cool
temperatures (about 65F). I let the dough rise extra long (about
+50%). I think I ought to get new instant yeast.
| |    |
| 11/14/04 | | Tried two
batches---one of four and one of two. Shaping the batch of two felt
good, but it was hard to keep the shape from getting too long. Need
some more practice on shaping larger baguettes. Took longer than I
thought to cook. I left some baguettes cook for up to 29 minutes(!)
Need to update recipe: outside baguettes should be rotated at 20
minutes, outside and smaller baguettes done at 25 minutes, middle
baguettes done at 30 minutes. I checked the internal temperature:
210F. Small baguettes: excellent crumb and flavor. Wow! Impressive. |
|    |
| 10/23/04 | | Used the 8 oz. BF
pre-ferment recipe. For the second mixing, I first integrated the
ingredients to the point that I could knead, then I added the
pre-ferment pieces. This seems to have allowed the pre-ferment pieces
to integrate well. Found mold on my cloth; it's clearly due to the
fact that I stored it in a plastic bag. Bad idea! Used 3 ice cubes
at start, then one a minute for three minutes; extra steam seems to
have helped with in-oven rising. Dough gave off excelent sweet smell
after rising and during kneeding. Did a significant amount of
kneading---more than September tries. Sides of baguettes came out
underdone. I think I should really do 450F as a baking temperature in
the future. One baguette looked done at 19 minutes. I turned the
temp down to 450F and left the other three in for a few minutes
longer. Also, I turned around the outside baguettes to try to even
out the baking.
| |    |
| 9/10/04 | | Used 6 oz. BF,
3/4 c. water sponge. Let rise for 2 hours. Added 6 oz. BF, 1/4
c. water, 2 t. kosher salt, 3/4 t. instant yeast. Knead. Let rise
for 2 hours. Fold. Let rise for 40 minutes, then 20 minutes in
fridge. Cut into thirds using scale (6 2/3 oz. each). Shape to
batard. Rest. Shape to baguette. Didn't roll out as thin. Proof on
canvas. Oven at 500F for 18 minutes. Two ice cubes to begin, another
two after 90 seconds. A little burnt on bottom. Maybe 450F would be
better cooking temp. Externally, best looking bread so
far---perfectly straight, excellent slashes, golden brown color.
| |    |
| 9/04/04 | | Tried two
different recipes: 6 oz. flour, 1/2 t. salt, 1/3 t. yeast, 2/3
c. water as a pre-ferment, and 6 oz. flour, 1/3 t. yeast, 3/4 c. water
as a sponge. Doubled pre-ferment proportions. Added 1 t. salt, 1/2
c. water to sponge. Sponge recipe didn't rise much in oven, but came
out better. Both doughs were too wet. Need to cut down on water a
bit. Also, used SdLT tools for transfering, slashing & sliding into
oven. Very nice shape & look. No more "S" breads. Next: try sponge
of 6 oz. flour, 3/4 c. water; add 6 oz. flour, 1 t. salt, 2/3
t. yeast, 1/4 c. water.
| |    |
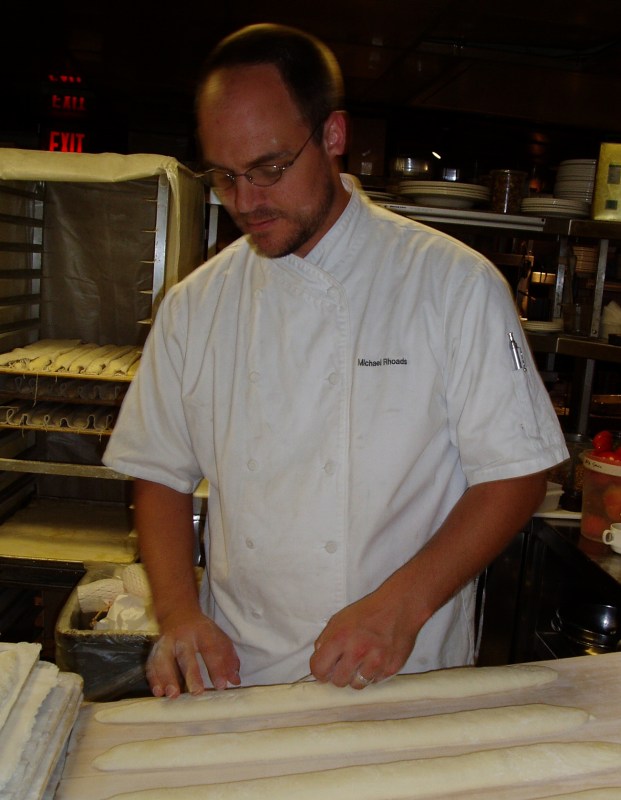
| 8/28/04 | | I can't imagine a
better birthday present than getting to spend a day in one of the best
bread bakeries in Boston. My wife gave me exactly that. She arranged
for me to spend the day with Michael Rhoads, the master baker at Sel de la Terre. If you've
never had their baguette, you're missing out! I spent the morning
with Mike, learning about shaping, proofing and slashing baguette, and
how to properly transfer to peel and into the oven. So much I didn't
know! A razor blade is the only way to slash baguette! I'll
never use a knife ever again. I also now know why they use canvas for
proofing. It's not so much for shape as it is ease of transfer to the
peel: place a board next to the dough, raise the canvas to roll the
dough onto the board, then roll onto the peel. One thing to remember:
proof and bake seam-side down. Only time the bread should be
seam-side up is on the board. Mike showed me how they shape baguette:
such technique! When I tried later in the day, I started to get the
hang of it. Oh, and I got to mix lots of pre-ferments. For the white
doughs, they use about a 1:1 flour water ratio for the pre-ferments
and mix them in 15(?) gallon buckets. You just dive in with your hand
and mix away. Felt like I was a kid again. :-) Oh, and my favorite
part was sliding the proofed dough into the oven. Four baguettes go
on a peel. You slowly ease the peel into the oven. Then, when you're
3/4 of the way in, you push-and-yank. The dough slides perfectly onto
the hot oven surface. Oh, and what ovens! No ice cubes, baby! Just
press a button and the oven fills with steam. There's even a lever to
pull to vent the oven and let the steam out. Good news for home
bakers like me: they use a 500F cooking temperature for about 19
minutes. Of course, they eye-ball instead of timing. Helen visited
me for a lunch in the SdlT dining room. I had a great steak frites
and Helen had perfectly cooked eggs sunny-side-up (not overcooked like
most places do them). After lunch it was back to the kitchen. I
spent spent some time with Dave, the master mixer. He introduced me
to his two mixers: the big one and the baby. Though, the baby handles
5-10 times as much dough as my home Kitchen Aid! The big one handles
twice as much dough. The dough hook is two feet tall! Anyway, they
measure everything by weight as I've heard from reading books. Also,
everything is in kilos. Mike says its easier than dealing with
fractions and whatnot. I agree. Their scale is a serious scale:
measures down to the gram, though not always perfectly reliably :)
Dave had me (try) to take dough out of the mixing bowls. OMG! The
dough sticks like glue and does not want to break apart. Dave can
somehow get his arms completely under and pull out an entire batch
(25+ lbs.) at once! The dough goes into 4' by 2' bins for rising.
They stack. By the end of mixing, we had a stack ten bins high!
That's something like 250 pounds of dough! Did I mention they go
though 300 pounds of flour each day? After getting to know the
mixtures, I got to work with Rachael. We did cutting and shaping.
She's so fast it's amazing. Dough has to be segmented into pieces,
anywhere from 8-24 ounces depending on the bread. She cuts an initial
piece that's usually within 10% of the desired weight then adds or
removes a small piece to get it to the right weight. 5-10 seconds max
for each chunk of dough? Me? Took me at least 30 seconds for each
chunk! Guess it takes a while to eyeball 20.5 ounces of dough. For
their round loaf breads, they use mainly plastic baskets, with a light
covering of rice flour to make sure the dough doesn't stick. Wicker
is too much trouble for the volume they do: it accumulates bacteria
and can't be thrown in the diswhasher. Rachael said they will only
last 2-4 weeks before they'd have to be thrown out! Rachael tried to
show me how to shape boules. It's amazing to watch. Her hands circle
rapidly around the dough, applying pressure with alternate hands. In
10 seconds, it's a perfect ball with excellent surface tension. After
watching her enough times, I could sort of do it on the wetter doughs,
but the dryer ones like rye baffled me! No trouble for Rachael! The
boules go in baskets, on trays, seam-side up. They have nice proofing
racks with tent-like covers to keep the moisture in. Before it was
time for me to go, Rachael and I shaped a special batch of baguette
dough. Only with her help was I able to approach the signature SdlT
baguette shape. I transfered, slashed and put them in the oven.
After they were done. I said my good-byes. Dave and Rachael were
great to work with and Mike was extremely gracious to let me invade
his kitchen :-) Besides giving me two baguettes to take home, they also
gave me some going away presents: my very own couche, board and razor
blades. All the things I was missing! Can't wait to bake bread
again!!! So much new knowledge to apply!
Pictures (L to R): (1) Mike transfering dough to a peel, (2) the
ovens, (3) lunch with Helen, (4) Dave and his mixers, (5) the
sourdough culture, (6) Dave and Rachael shaping boules.
| |


|
| 8/26/04 | | Baked 500F for 20
minutes, used five ice cubes. Bread came out golden brown, burnt in
some spots, yellow in others, but overall excellent exterior
done-ness. Crumb was chewy w/ lots of holes, though I wonder if it
would have benefited from some more kneading; crumb felt a little too
fluffy. It also felt a touch dough-y. Maybe baking at 450F would be
better. Bread had wonderful smell and flavor. Dough did not seem
happy during shaping: there were two "lumps" in the dough and it
didn't rise much during proofing. I think the lump problem was caused
by mixing the dough pieces with water; dough pieces should be mixed
with dry ingredients, then water added. To reduce recipe, try 6
oz. flour, 1/2 t. salt, 1/3 t. yeast, 2/3 c. water.
| |    |
| 8/19/04 | | Used new, high-water
recipe. Dough was very wet (as expected). I did minimal
kneading. Only innovation was ice: I threw four ice cubes on the
bottom of the oven. Bread rose very quickly initially. I think ice
cubes provide more steam than the sprayer I have used before. Bread
tasted wonderful and had great texture. Very airy, getting close to
Clear Flour airiness. I started the oven at 500F, turned it down to
450F after adding the ice cubes, then (rembmering the new recipe),
turned it back up to 500F with 7 minutes to go. Two loaves were done
at 22 minutes, one needed 2 extra minutes of cooking.
| |    |
| 6/27/04 | | Used 8 oz. bread
flour (no AP flour), 7/8 c. water in both mixings. I also hand-mixed
the dough like Julia describes; would have been hard to scrape out of
the bowl had I done it via Kitchen Aid. Dough was much more airy than
usual, good holes in finished product. Big improvement over previous
tries. Accidentally left oven temp at 500F, took bread out after 19
minutes noticing that crust looked burnt. Crust tasted
great---crispy, but not burnt tasting; inside was a bit dough-y.
Crust was golden brown, burnt in spots. Somewhat like "Sel de la
Terre" bread.
| |    |
| 4/25/04 | | Used 1 c. water in
second mixing; dough was hard to get out of bowl, but great otherwise;
retained an internal sticky-ness through final shaping. Kneeded only
5 minutes for 2nd kneeding. Used 2 t. kosher salt for second
mix---much better flavor than last time. Overall, very good outcome.
Good taste, good texture (though center was a little dough-y in some
parts). Need to try using less flour---maybe 9 oz per mix (w/ 7/8
c. water). I always end up with too much dough and have to scrunch
the baguettes to make them fit on the baking stone. Baguettes were
thinner than usual (2 in. dia.) (guess I shouldn't have rolled them
much during shaping). |
|    |
| 2/8/04 | | Needed more water
than usual, almost 1 cup per mix; maybe due to less humid winter air?
Made dough sticky after 2nd mix---stuck to bowl and table; was fine
after some kneading. Dough seemed to do little during rises and
proofing, but opened up very nicely in oven---probably one of my best
breads. I am beginning to think that the size of holes has more to do
with the flour-to-water ratio that how much the bread rises before
baking. I kept two loaves in the oven for an extra minute---the crust
didn't look finished. I think I should have kept them for a bit
longer. The small loaf had great texture; the other two were a bit
dough-y. I used kosher salt this time (2 t. kosher = 1 t. table), 1.5
t. for the first mix, 1 t. for the second (less, thinking that it was
inhibiting rising). Bread came out bland. Guess I should have used
the standard formula. |
|    |
|